Monday, July 16, 2012

Grand Teton Multi Pitch Level 1 Class with Exum

We are training to climb the Grand Teton!!!

The level 1 class with Exum was exciting, enlightening, adventurous, and absolutely perfect!  My friends and family are well aware of my obsession with Jackson Hole, Wyoming and Grand Teton National Park (GTNP).  Today increased my passion for this absolutely stunning area.
I cannot believe how close I am to climbing the Grand Teton!  I posted about this exciting adventure here, and there are only 4 more days until this dream is a reality and we summit the Grand!  I am so glad we chose Exum Mountain Guides to help make this happen.
 Greg is pointing to the top of Teewinot, just below where we will be climibing in a few days!

We bouldered, belayed, climbed, hiked, and repelled all around the Jenny Lake area near Hidden Falls in GTNP.  This was such an exciting 8 hour day!  There was never a dull moment.

We started off getting our bags situated.  Our guide, Bill Anderson let us know we had overkill, so I consolidated some items.  By the end of me taking out rain pants, long pants, a fleece, and warm gloves, I was left with trail mix, rain jacket, 2 liters of water, as well as the helmet, harness & approach shoes provided by Exum.


Bill taught us to cautiously boulder by starting a series of bouldering.  First he watched us without any instructions and then taught us to hover our foot for a few seconds over where we wanted to step.  This helped us to balance, watch our foot placement, to find a hold that’s not too high, and to slow the pace for when we are being belayed.  We passed with flying colors!  Then we played “hot lava” to our next location.  Hot lava is when you can only put your foot on rocks or fallen wood.  This was also for coordination and balance. 

We then practiced leaning slightly forward while down hiking so that your head is in a position that if you were to drool, the drool would be in front of you.  This keeps your knees safer, taking smaller steps, and getting your weight in the right area.

Bill taught us our basic knots for climbing:  bowline, figure eight, and the overhand knot.  From there, we practiced belaying with both hands so that we could be ambidextrous on the mountain. We did this seated with our feet bolted down on a rock to stay put, keeping the most strength on the foot with the same side of your climber.  The rope goes behind your back for strength and friction.  Your body acts like a clip in the mountain.

Neal belaying Dad
We all were then hooked together with the ropes and practiced some more hot lava over to Hidden Falls.  During this, we put our excess rope around us in a Kiwi Coil so as not to have the rope tangled in our hands.  At Hidden Falls, we broke for lunch to enjoy our turkey sandwiches, chips, & homemade rice crispy treats.

That's Neal, Greg, Kim and Dad all getting thier Kiwi Coils ready so we can walk in our line. 
Post lunch, we did 5 pitches of climbing and belaying in our group formation.  This was semi-challenging and really enjoyable.  Though I was on the climbing team in high school, I have never climbed real rock, only the man made climbs at climbing gyms.

Bill said we were far ahead of schedule since we all caught on really well to the lessons, so he decided we would cover repelling.  This was the most intimidating part for me.  We belayed ourselves a little over 100 feet.  We each did this two times before heading back to the Exum station, using our down climbing skills we learned earlier.
Kim repelling
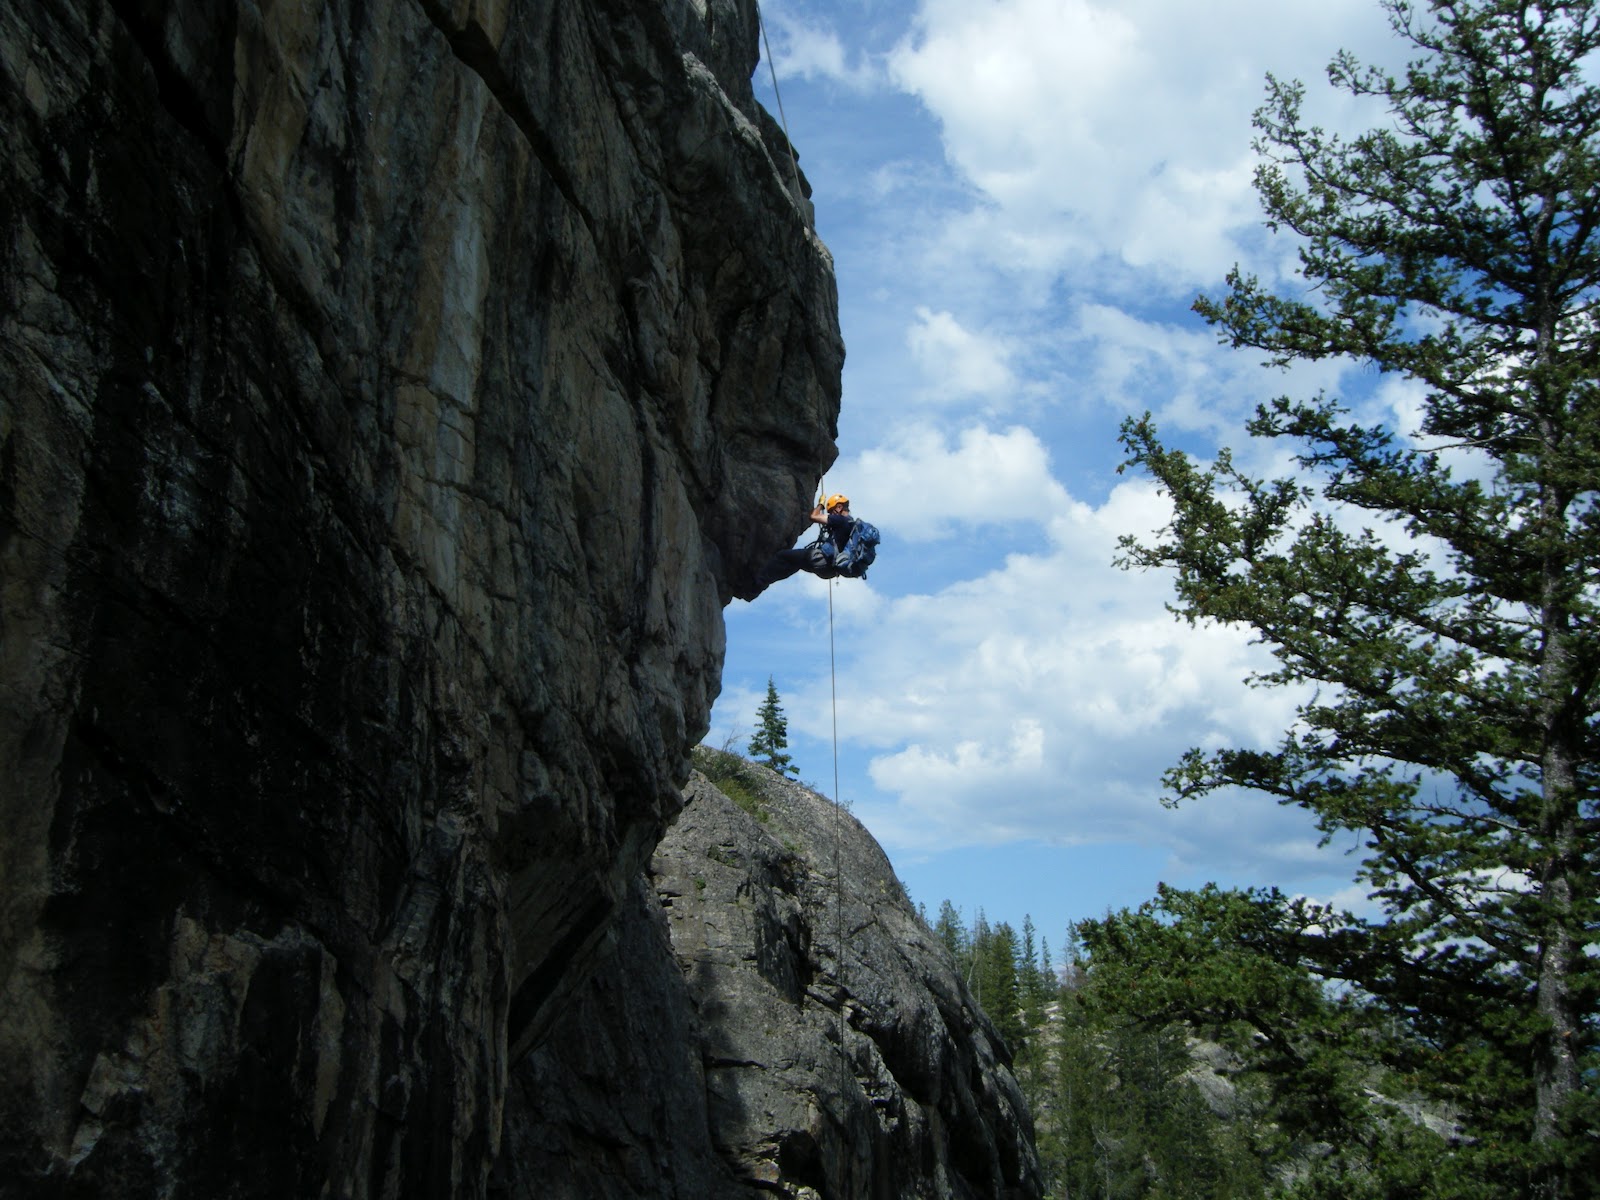
Dad repelling

The view from where we were repelling was incredible!  That's Jenny Lake.

The middle peak is the one we are climbing, the Grand Teton.  To the right is Mount Owen and to the left of the Grand sits Teewinot.  Mount Owen has more snow becaus it's not as steep as the Grand...yikes!
This class was very insightful!  I am so glad we had Bill as our guide!  He would have us each teach each other the knots, belaying or repelling techniques as he was setting up the next exercise or simply watching us instruct. 

Bill also told us we should eat all that we want and as much as we want!  Yay!  Tonight, I feasted on an amazing spinach salad with rotisserie chicken, chickpeas, olives, feta, roasted red peppers, artichoke hearts and a dressing of balsamic and truffle olive oil.  Right before that, Neal and I downed a free muffin from Pearl Street Bagels.  I love Pearl Street Bagels, so I picked up a half dozen for breakfast tomorrow!  Post dinner, I devoured a Chocolate Cabernet Sauvignon homemade ice cream in a waffle cone from Moo’s on the Northeast corner of the town square!  It was PERFECT! 
We are off to another class that starts at 7:45 am!  Have a great Monday!!!

Wednesday, July 11, 2012

Early Workout Deserves Yummy Protein Pancake Breakfast

On Monday and Wednesday this week, my husband had to be up and out the door by midnight for work. That totally stinks for all of us, but mostly him, of course. I enjoy the opportunity to go to bed a little earlier and wake up earlier. When I wake up well before 5am, I have an abundance of time to get in a good workout and enjoy some yummy breakfast. I also can't sleep sometimes after Neal leaves because Walden and Sasha are awake and want to play, Play, PLAY and eat, Eat, EAT, then pee, Pee, PEE on a walk, Walk, WALK. Ok, I think you get how annoyingly cute they can be :)

For Monday, I chose to do the P90X Yoga so I could build up a good sweat while getting in a great stretch. The workout is 1 hour and 30 minutes of some of my favorite yoga. You start off with sun salutations and moving asanas. You do this for almost 45 minutes. For those that aren't familiar with the term asanas, this is good article.  I am no am no expert, but when I think of these 'moving asanas' in P90X, I think of flowing, fluid, movements that keep your body and mind engaged in a healthy balance that stretches and expands your entire self. I find this section of the P90X yoga workout challenging and enjoyable. I sometimes even stop here if I am in a time crunch.

After the moving asanas, you do balance postures and floor work.  Then you move onto what Tony Horton call's Yoga Belly 7, a series of ab workouts that involve holding your pose for an extended period of time.  The workout finishes up with lighter stretching into what I call my relaxations poses: Childs Pose, Shavasan (Corpse Pose), Fetal Pose and Meditation Pose (Lotus) with Ohms.  
Boy does Walden FREAK out with Ohms!  He gets all in my face (he's still in his 'space' cone due to the broken paw featured here in my post on "Walden's Wild Weekend") and wants to bark and lick and bark and lick due to the 'strange' noise coming from me. 

Ahh, I love P90X Yoga with puppies around! :) 

Post workout, I whipped up an amazing batch of Tone it Up's Protein Pancakes. Recipe found HERE! They were delicious topped with strawberries and a tablespoon of maple syrup. Karena and Katrina (the Tone it Up girls) would probably not recommend adding the maple syrup and instead adding a little stevia.  However, maple syrup is better than the 'fake' processed syrup that comes in bottles shaped like people. Yes, I used to guzzle that stuff up on my pancakes, but prefer the flavor and 'realness' of maple syrup!

This morning, I did the same thing as Monday but switched workouts.

I did the Turbo Jam Kick Punch and Jam workout! I freaking love Chalene! Her workouts are so high energy and fun. I used weighted hand gloves to do the workout that's full of kickboxing, a little dancing and even some martial arts! I was able to burn about 480 calories in 50 minutes. I even felt good enough to take the dogs on a 15 minute walk, burning another 120 calories.

I started the morning off right with a quick shower and some more Tone it Up Protein Pancakes! I feel good!  Now time to work!

Happy WEDNESDAY!

Wednesday, July 4, 2012

Fourth of July!

HAPPY FOURTH OF JULY!

Thank you to all our Veterans for your dedication to this wonderful country I call home!
Mom, Dad, Kim L., Michael F., Cameron J., Josh L., Ryan B., Jason B., Conner E., Danny P., Grandaddy Bratton, Scott D. and many many more, thank you for all that you have done and all the sacrifices you and your family have made!

Today is absolutely one of my favorite holidays!  I love the Google logo right now!

This morning, was absolutely one of my least favorite mornings…

5am: Wake-up call by the one and only puppy, Walden.  Take him potty, put him and Sasha in the bed so they will sleep some more.

7am: Puppies are awake and ready for breakfast. Walden scarfs down his food as Neal and I relax on the couch…RING….RING….RING…RING – Walden is ringing his jingle bells and wants needs to go out, Out, OUT!

7:15am:  Can’t rest on couch, so we make a bowl of Multigrain Cheerios with strawberries as we watch a few episodes of the Fresh Prince of Bel Air and my favorite, Good Morning America.  Every 30 minutes, RING! RING! OUT! OUT!  So out we go. 

8:45am:  Finally Walden seems to have eaten and gotten all his outside business taken care of…Neal and I decide to take a nap, closing the bedroom so the dogs are out of the room.  Three phone calls later it’s 9:15am and I think I am home free!  Nap time here I come! 

9:15-10am: Puppy noises in our hallway…Dribble drip dribble.  Whine, whine!  Calm down for about 20 minutes.  Whine, whine, paw at the door.  Calm down for another 20 minutes.  Whine and scratch the hallway and the door with my space cone (Walden is still in the cone for his broken paw).  We decide no more sleep is to be had and open the door.

10am-10:10am:   That dribble drip dribble I heard turned out to be a HUGE pile of dog pee on the carpet in the hall outside our bedroom door.  SERIOUSLY!?  I took you out 10 minutes before I closed you out of the bedroom!  And three times before that!  So I clean up the dog pee.

10:10am:  Hungry again.  To lighten the mood, I make one of Neal’s favorites delicious cinnamon cream Neufchâtel cheese for our bagel thins topped with fruit.  Ahh, finally the morning seems off to a good start.  Time to digest and go to the gym!
Cinnamon cream Neufchâtel Cheese Bagel
1 oz Neufchâtel cheese, softened
 ½ teaspoon sugar
1 teaspoon cinnamon
Blueberries
Raspberries
 2 pinches of shredded sweetened or unsweetened coconut

Combine your Neufchâtel cheese, sugar and cinnamon in a small bowl with a knife.  Toast your bagel, spread your Cinnamon Neufchâtel cheese, top with your fruit and coconut!

Enjoy!

Happy 4th of July Ya’ll!!!

Monday, July 2, 2012

DIY Throw Pillows

Recently, I became obsessed with whites. White walls, white floors, white lights, white accent pieces...the list goes on. I am inspired by the ambient settings found in such places like the picturesque scenes in the Pottery Barn magazine.

I used to think whites were so blah, until I realized how they could bring a room together; making me feel calm, serene, collected, and peaceful.  I knew I had to bring white into our living room, and since we painted less than a year ago, that was out of the question for me.  Don’t get me wrong, I love to paint a room, but I hate to waste money on something that’s been done so recently.
Then, it hit me!  I had wanted new pillows for a long time but never found any I liked.  I thought I wanted browns and oranges, but this was the perfect place for me to bring in white!  I searched so much for pillows in my original colors of brown and orange without luck that I decided not to even attempt to look for white pillows.  I knew I wanted to make them.

The end product.

How did I do it?!
Finding the perfect fabric is so important to me.  I am all about texture.  I love the way leather feels cool when you first touch it, the softness of a chenille blanket wrapped around my feet at night, worn wood of a coffee table that’s been saturated in natural oils, the coarse grains of burlap wake me up, and the perfect amount of silkiness in Sateen Beech sheets put me to sleep.  I needed something just perfect for me.  I found muslin.  I hadn’t worked with this fabric before and really enjoyed the soft feel of its natural, earthy, texture.  I purchased a 2 yards of “whites”:  ecru and natural. 

I really love 3D flower patterns on pieces  The wedding dress I dreamed of getting a few years ago had the entire bottom covered in big modern flowers.  I settled for a less modern look and think it worked out well!
Back to the pillows…

I kept seeing the pretty flower patterns from designs on Pinterest and knew I wanted to make a large flower on one pillow.  I also wanted to make two more pillows.  I started off with ruffles and writing.  I wanted to write on one and put lines of ruffles on the other.  I took to my sewing machine.

After finishing the ruffled pillow and showing it to my husband, I decided to scrap that idea since it really didn’t fit our joint style at all.  My husband is very modern so I drew up a picture of chevron print, to which he approved.

Here’s how I did the 3 pillows.

Pillow 1:  Flower

1.      Measure the pillow size you want (I went off an existing pillow I was going to cover) and cut 2 pieces of equal sized fabric leaving about ½ in on each side for stitching and any mistakes.

2.      Sew your zipper if you would like to use one for easy cleaning, if you don’t want a zipper then skip along to the next step.

3.      Cut 20-30 three inch diameter circles and 20-30 two inch diameter circles.  I traced the bottom and top of a glass onto my fabric and cut the circles out individually.

4.      In the center of one of your pillow fabric pieces trace a circle.  I used a plate.

5.      Fold your large circles in half, even make a little tuck if you want for depth (see picture) and pin in place.  Do this around the entire circle to make your first row of petals.  Sew with your machine using the basic stitch.

6.     Place more of your large circles folded in half inside your sewn in circle of petals’.  Keep doing that and gradually move to the smaller circles you cut.

7.      To Sew your pillow together, pin it inside-out and use a basic stitch around the edges of the 2 fabrics, leave an opening to hand stitch after putting in your stuffing if you did not insert a zipper.
FINISHED!  Now you have a beautiful flower pillow!

Pillow 2 – Chevron

1.      Follow steps 1 & 2 above.

2.      Iron Under Wonder, a fabric adhesive, to the fabric you want as your chevron color.

3.      Freehand draw or use a pattern to make zig-zags aka chevrons on your fabric.  You can write directly on the under wonder.

4.      Cut your chevrons and peel the Under Wonder paper off your fabric.  Your fabric should be slightly sticky or shiny pending on the Under Wonder you used.

5.      Space your chevrons on your pillow and simply iron them in place when you have them set.

6.      Sew your pillow together as described in step 8 above.
FINISHED. Now you have an awesome chevron pillow!

Pillow 3 – Words

1.      Follow steps 1 & 2 from your flower pillow.

2.      In Microsoft Word, type out what you would like to have on your pillow.  Print that.  I used words from our wedding vows!

3.      Place your print under your fabric.  If your fabric is light, and you can see your words, proceed to trace them.  If it is not, you can try putting white graphite paper under your printed paper and trace that directly onto your fabric.  I know this works for dark wood signs, not sure if it’s the same on fabric….
4.      Sew your fabric up as described in step 8 from your flower pillow.

5.      Now you have pillow with whatever saying you would like!

If sewing intimidates you, you can easily do pillows 2 & 3 without having to thread a needle.  All you need is some pre made pillow cases, extra fabric and under wonder for the chevron pillow and a fabric pen found at many craft stores for the words pillow!
Give it a try!  Dream big and make something you will cherish in your home.

Goodwill Cabinet Turned Craft Room Masterpiece

I absolutely love finding a good deal on something. What I love more, finding a good deal on the perfect unique something!

I was at Goodwill when I came across an armoire.  It had some great bones, but I wasn’t sure what Neal would think.  I took a picture and walked away. 
For about 3 days, all I could think about was the armoire.  I knew it had to be mine, and for $35, I couldn’t pass it up.  When I went back one evening, it turned out the furniture section was closed for the night!  I stressed until I could return the next afternoon to see if my armoire was still in the store.  To my delight, it was!
I cleaned the piece with water, pledge, and elbow grease.  I lightly sanded the tops and sides before painting.  I didn’t prime the furniture, but vow to do so next time I paint.  I ended up using 3 coats!

The piece was very unique and I decided I wanted the hinges and knobs to stand out.  I found this cool, textural Kryon spray painted in hammered metal at Menards to do the job.  Since, the hinges weren’t real, they didn’t come off. I taped around them and spray painted.

I took the knobs off and spray painted those. 

After the 3 coats of paint, spray paint, and elbow grease, I believe I have a great piece of furniture.  I decided the piece would best be suited in my craft room (also known as the guest bedroom) and immediately took my supplies out of the closet and into my new craft armoire.

After about a week, I wanted something more.  I wanted a chalk board inside the doors of the armoire!  I went to Hobby Lobby and purchased a small bottle of chalk board paint and used a 4inch foam roller to cover the inside doors.

I love the way this project turned out and I love the craft room with this piece.